Webex is a great video conference tool. Below are tips showing how teachers can get started, adjust meeting settings, and more.
Teachers: How to Get Started
Teachers should start meetings from the BLS Webex website. This will ensure that meetings are starting with the most updated version of Webex. Many teachers launch meetings from the Webex app and that’s OK too. The desktop app should automatically update as well.
In the video below, you can learn how to do a number of things.
- Visit the BLS Webex website.
- Sign in with your school district account.
- Change your profile picture.
- Download the Webex app to your laptop.
- Learn about the differences between using the Webex app and using Webex in an internet browser.
- Schedule a Webex meeting and save a meeting template.
Students: How to Get Started
- Student Set Up Video – NEW for the 2021-2022 school year!
- Students only need to Sign In when they open Webex for the first time.
- Students can access Webex meetings in several ways:
- Webex app on their iPad’s homescreen
- Link found in their teacher’s Clever page
- Link shared via Seesaw, Google Classroom, Canvas, or email
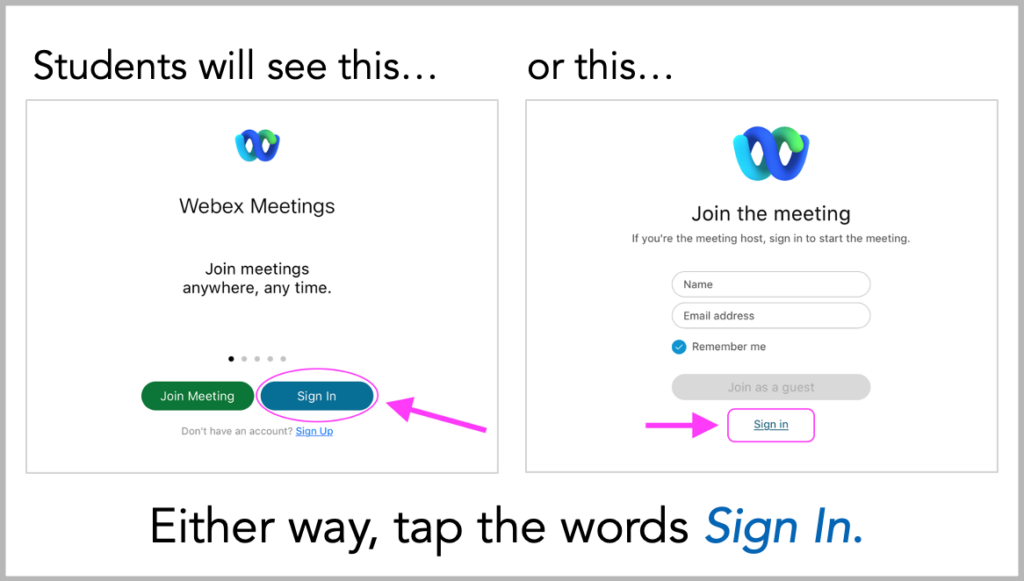
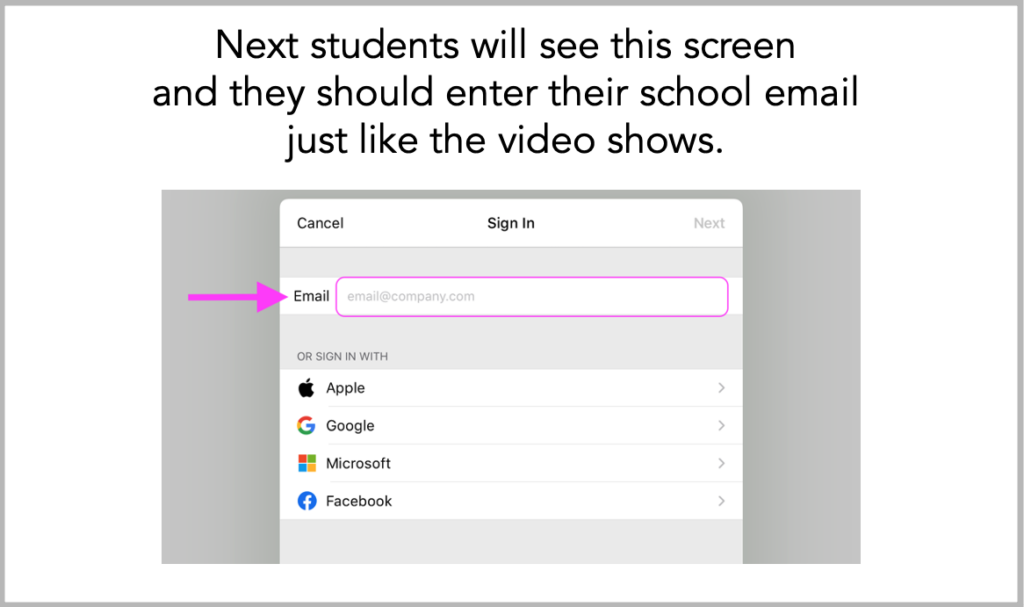
Sign Into Webex as a Student Participant
Students need to sign into their Bend-La Pine participant accounts. In this video, you’ll learn how students can sign in to Webex:
Adjust Meeting Settings
Please note, many of these settings need to be adjusted (checked/unchecked) at the start of each meeting.
Tips for Teachers
- Attendance Reports
- Breakout Sessions and Assignments – video
- iPad – Screen Share – video
- Polling Feature with Students – video
- Scheduling a Meeting – video
- Recordings – How to Record a Webex meeting – video
- Recordings – Save to Your Desktop – video
- Recordings – Access and Share